Hello everybody,
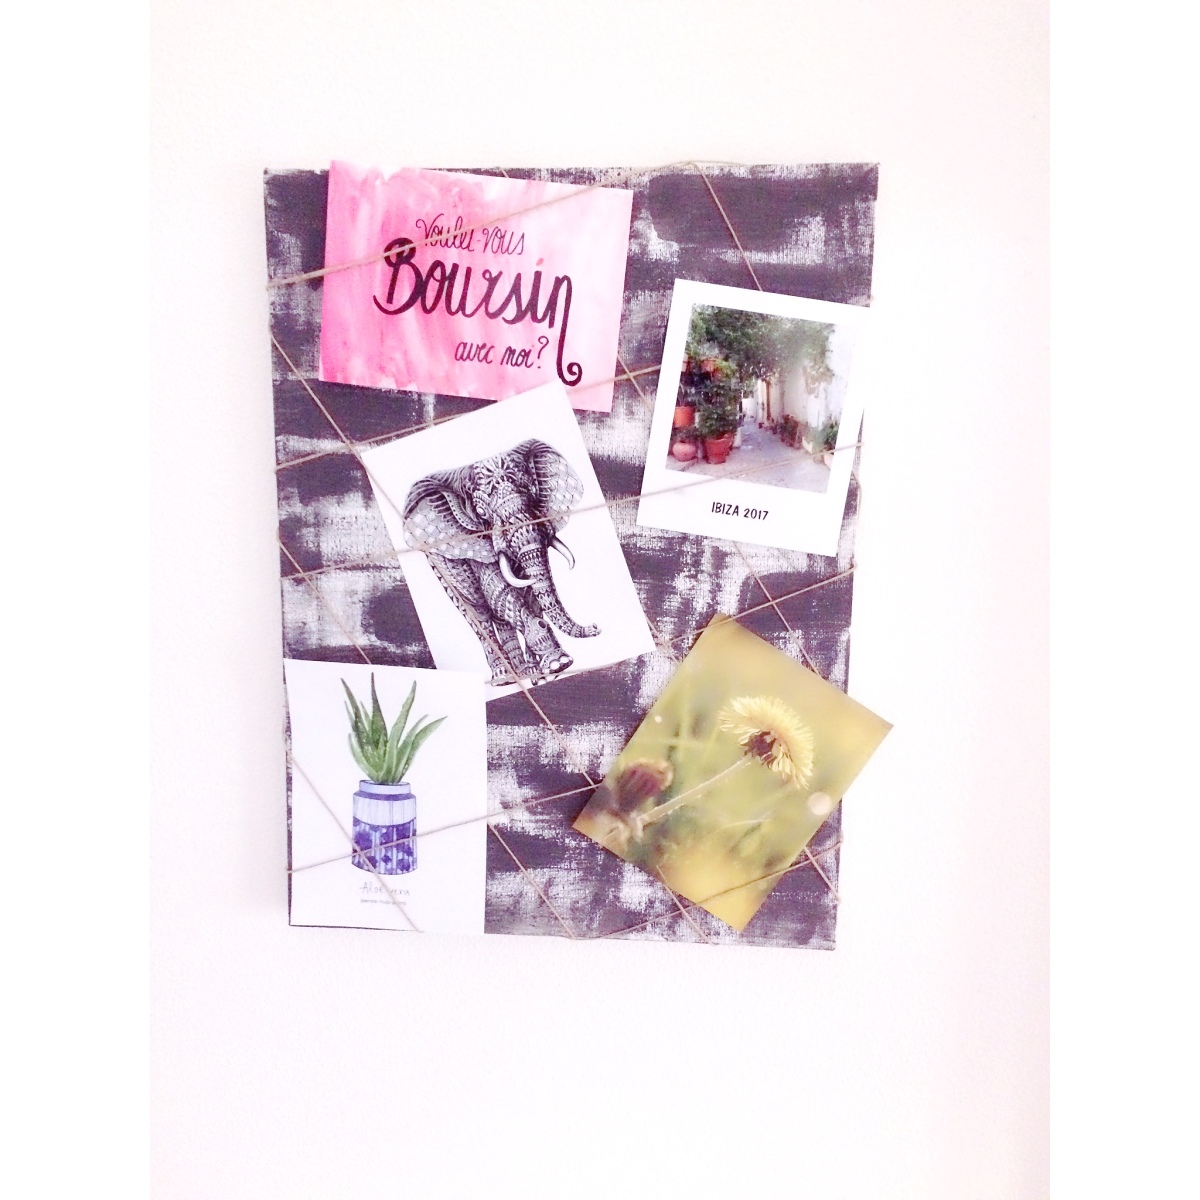
I’m back with a new post! This week I’m showing you how to make this cool wall decor. It’s a cool way to display photo’s and it’s really easy to make.
What you’ll need: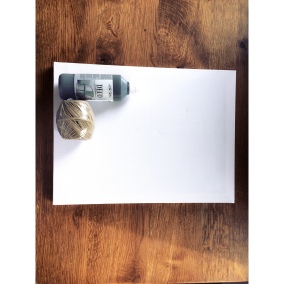
- A canvas
- String
- Paint
- A stapler
- Photo’s/ postcards/ printed images of your choice
Step 1: Painting the canvas
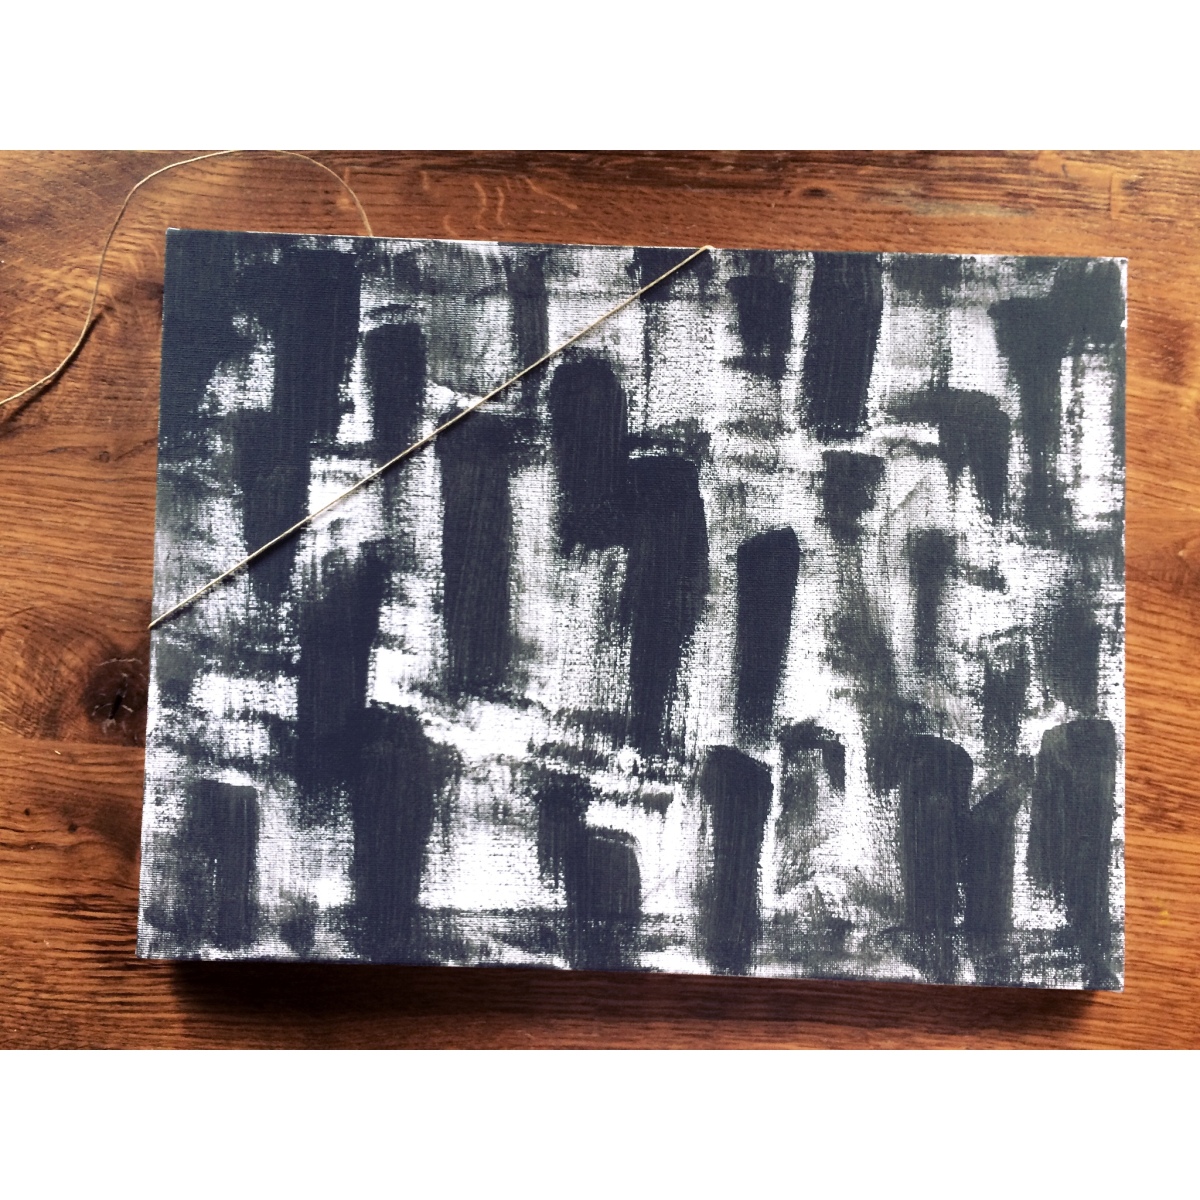
I chose to use dark grey paint and paint it in thick streaks to create a rough effect, but you can choose any colour and style.


Step 2: Attaching the string
Once the paint has dried, turn around the canvas and use your stapler to staple the back. Make sure not to press too hard.
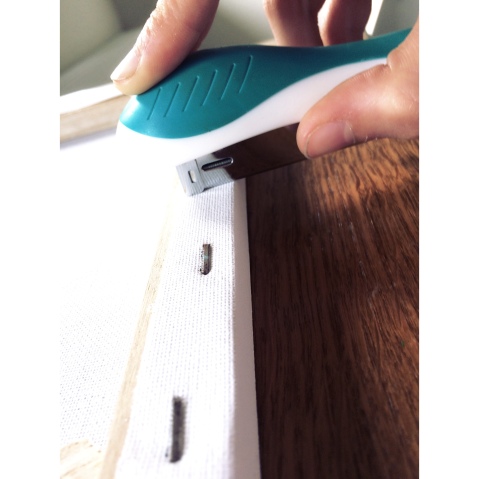
Now, knot the string to that staple.
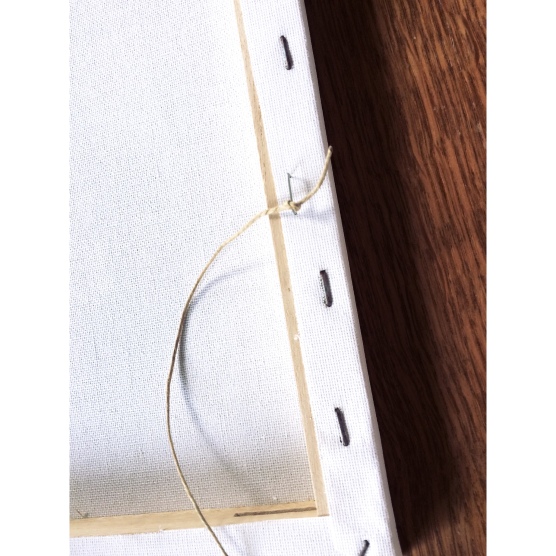
Step 4: Creating the net
Then you turn the canvas around again and pull the string across it.
Turn the canvas around and staple the string to it.
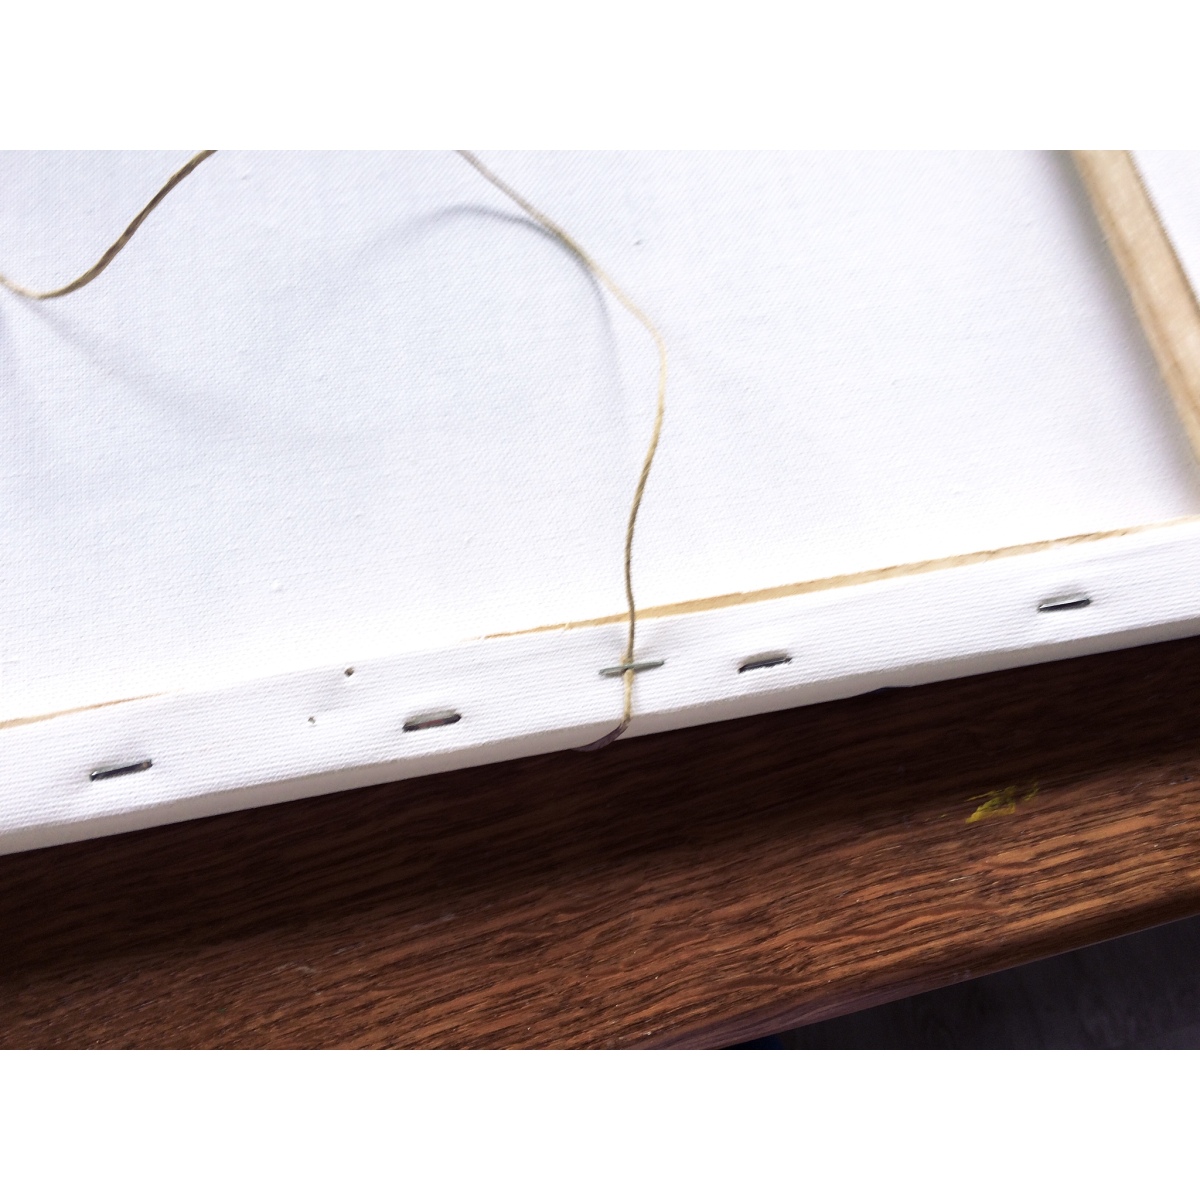
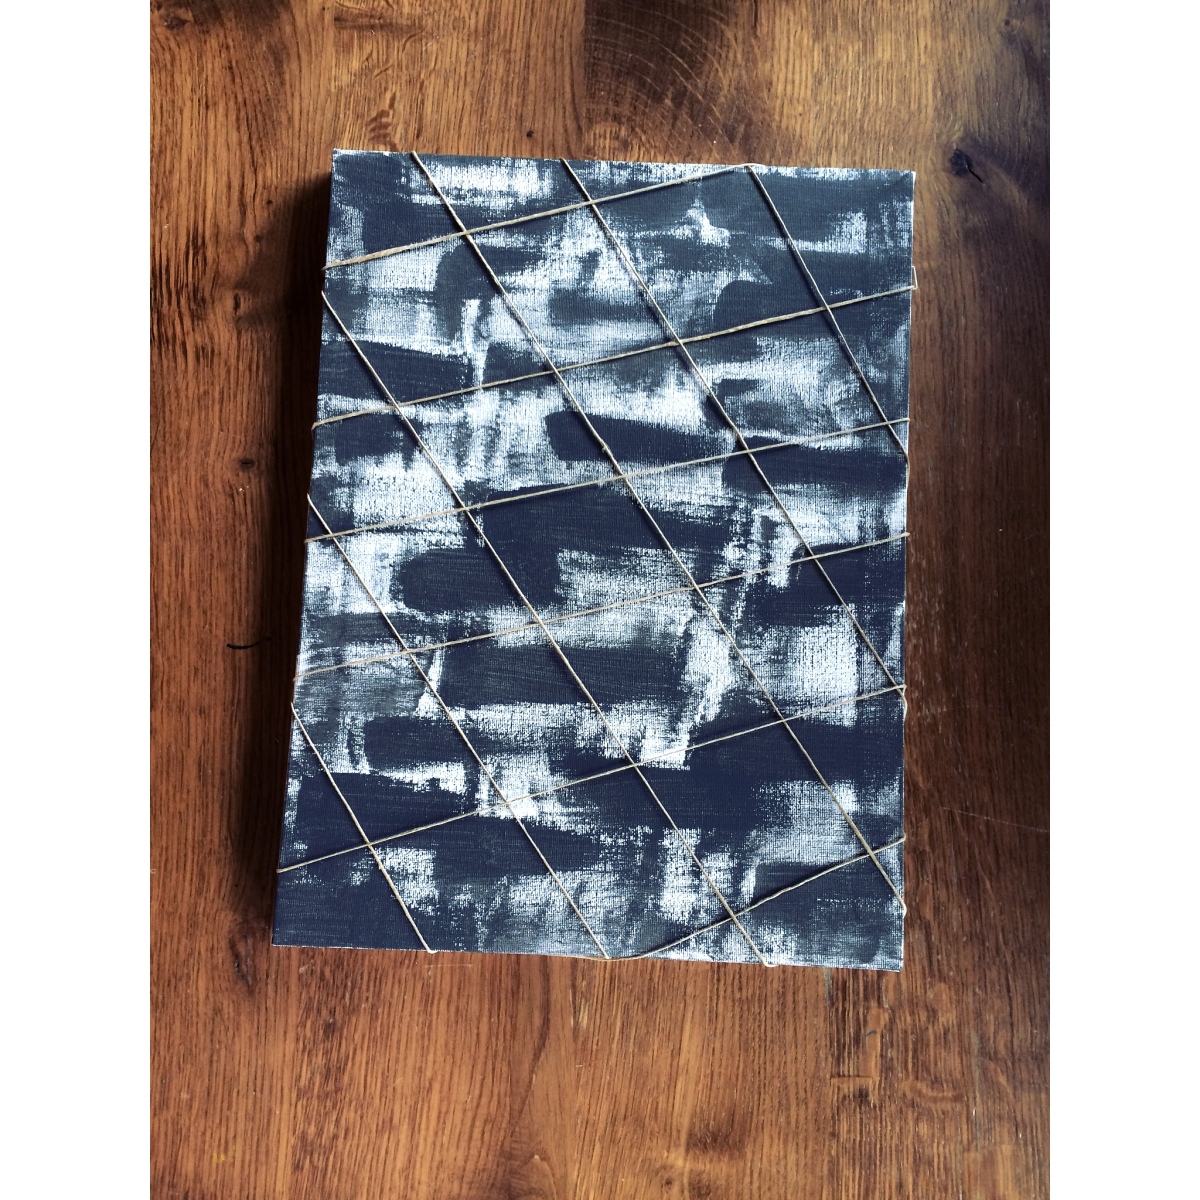
Repeat this, stapling the string to the canvas every time. I chose to create an even net, but you can also do it randomly.
This is how it’ll look:
Step 4: The images.
Collect photo’s, postcards and printed images and stick them in the net at a crossing point. And that’s it!
I think it’s a cool decoration for your room and a great way to display photos and it’s really easy to customise and rearrange.
If you liked this tutorial and found it useful, please like, comment or share. It really means a lot to me.
See ya next week!
xxx, Yara

This is so cute! Will be making this for my room!
LikeLiked by 2 people
Thank you!
LikeLiked by 1 person
Adorable…. Will try it soon 💟
LikeLiked by 2 people
Thanks!
LikeLiked by 1 person
Echt heel leuk!!
LikeLike
I’m so gunna try this one! i actually have the materials!!
LikeLike
Cool! I hope you have fun making it 😛
LikeLike
I had fun lel
~ a friend
LikeLiked by 1 person
What a great idea!
LikeLiked by 1 person
Thank you!
LikeLiked by 1 person
You’re welcome. I really like your DIY’s! They are really cute! And useful!
LikeLiked by 1 person