Hello everybody!
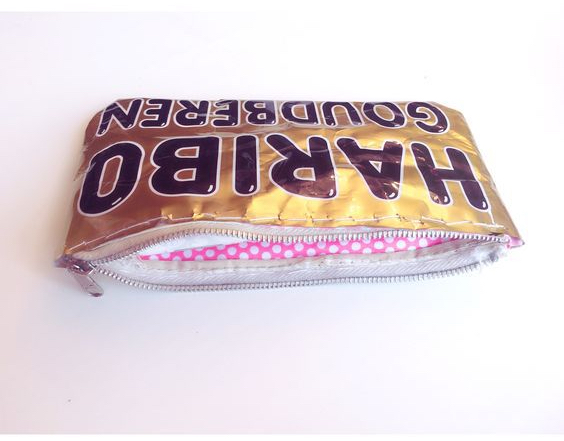
Today I’m showing you how you can make a super cute pencil case.. out of a candy bag! I really like how this turned out and it wasn’t that hard to make. You can choose your favorite candy bag or any packaging that you like.
What you’ll need:
- A candy bag
- Some cute fabric for the lining
- A zipper
- Needle and thread
- Scissors
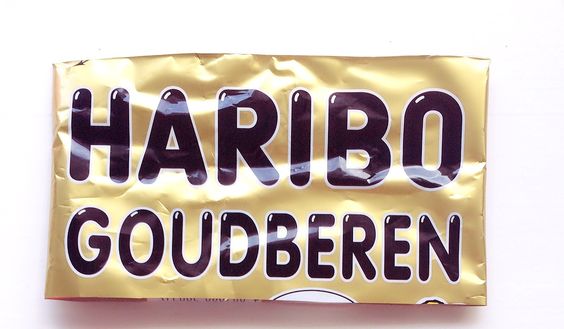
Step 1: Cutting the bag.
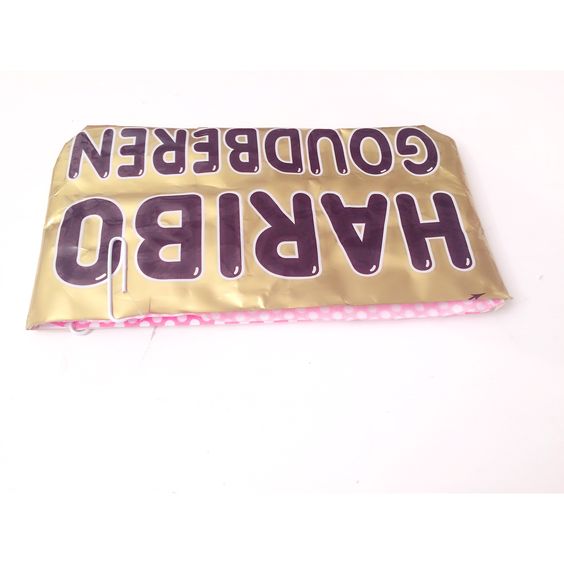
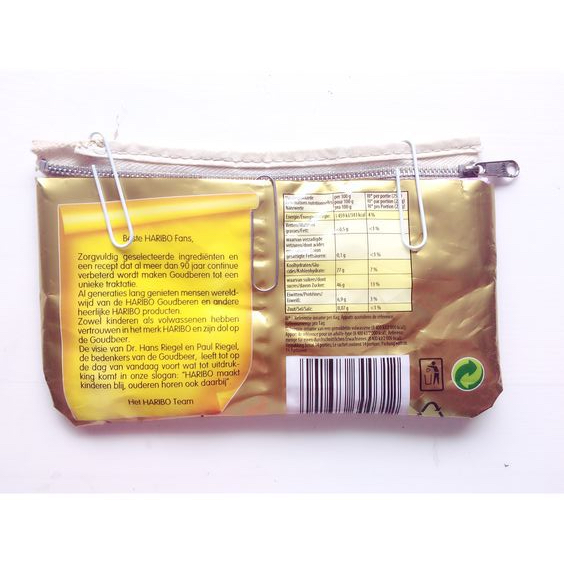
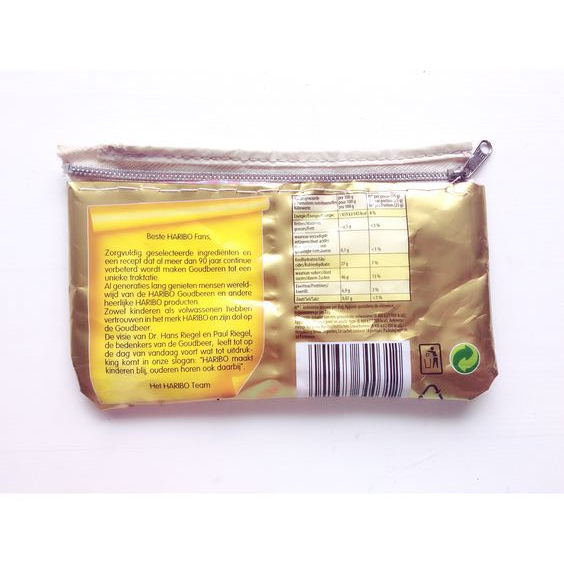
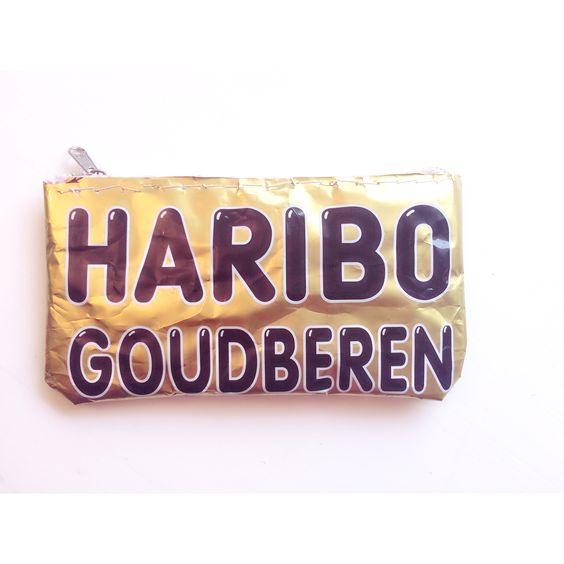
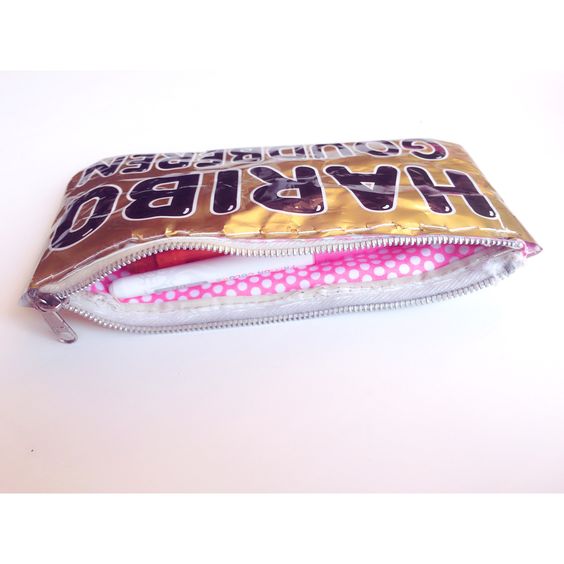
I decided to use this bag of Haribo gummy bears.
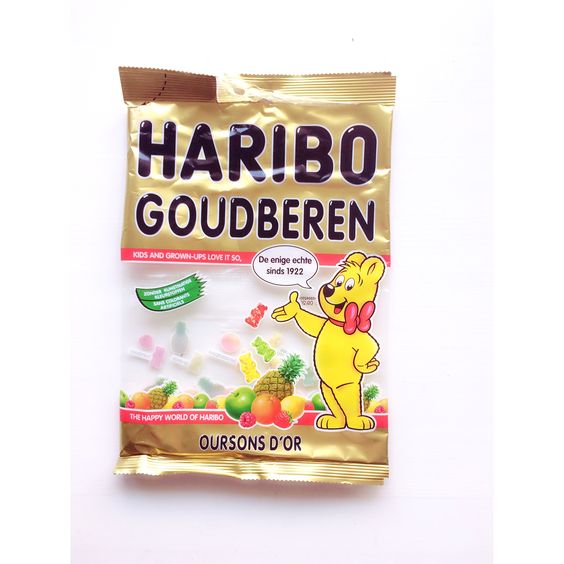
I really liked the golden part at the top so I decided to cut that off, but you can make your pencil case bigger or smaller if you want. The great thing is that many medium-sized candy bags are already the perfect size for a pencil case.
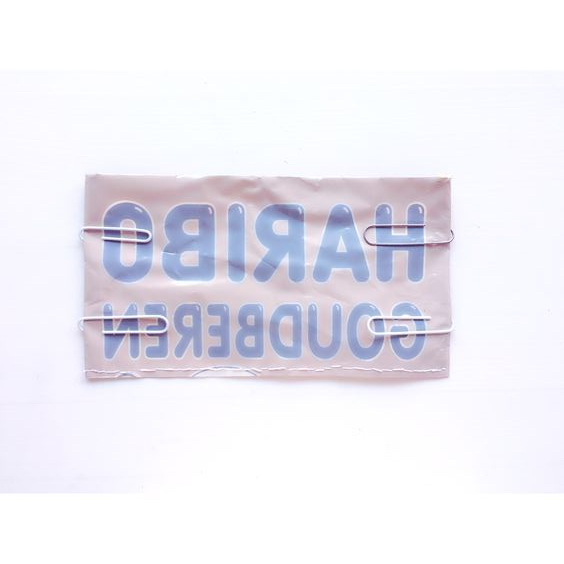
Step 2: Sewing the bottom.
For this step, start with turning the plastic inside out. Do this really carefully, it tears really easily!
Then take your needle and thread and carefully sew along the bottom. Make sure to keep a margin, as it still tears easily. I used some paperclips to keep the plastic in place.
Step 3: sewing the lining
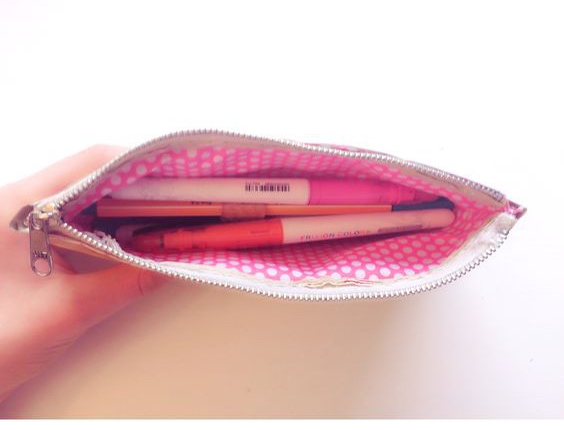
Of course, the lining isn’t necessary but I think it makes the pencil case so much cuter and a lot more durable.
To sew the lining start with cutting a piece of fabric that is twice the length of your plastic. I used this really cute fabric I bought in my post Crafting Supplies Haul.
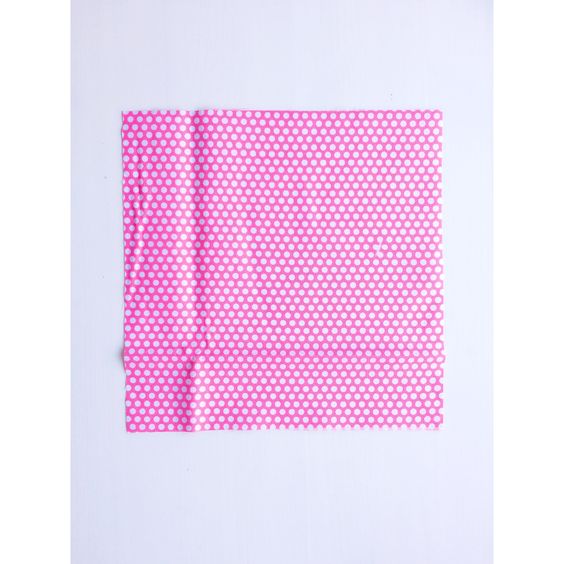
Fold it over so the right sides face each other and sew along the sides.
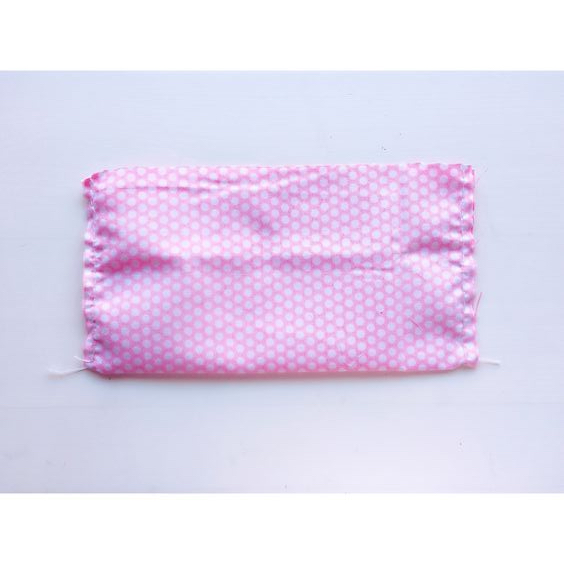 Step 4: Placing the lining in the plastic.
Fold the plastic right side out again and place the lining inside.
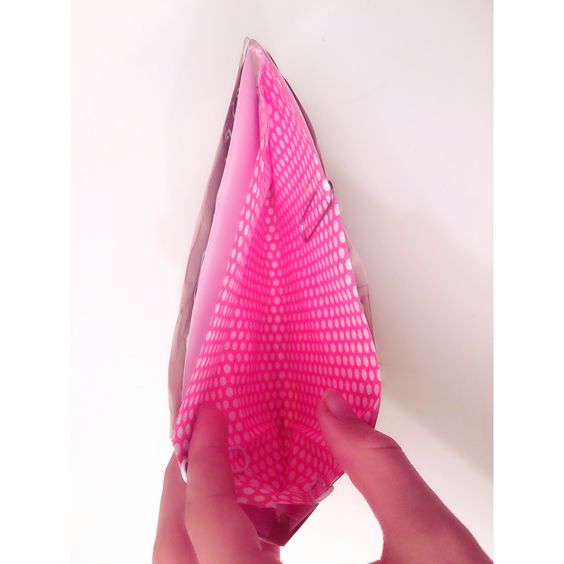
As you can see in the picture I added two pieces of strong paper to make the pencil case a little more sturdy. To do this just cut two pieces that are slightly smaller than the case and place them between the lining and the plastic.
Step 5: Adding the zipper.
The last step is to add the zipper to the case. To do this, place the zipper inside the lining and hold it in place using a few paperclips.
Then, carefully sew along the edge, sewing the plastic, the zipper and the lining together all at once.
Repeat the same for the other side.
And that’s it! I think it turned out really cute, I love the gold colour. What do you think?
I hope you enjoyed this tutorial. If you did, please like, comment and/or share. I would really appreciate that. And follow me for more DIYs and creative content!
xxx, Yara

This is an amazing idea! I will have a go at making it (know I saw a zip in a shop somewhere 😂) great craft! 💗
LikeLiked by 2 people
I’m glad you like it^^
LikeLike
Super cute!!
LikeLiked by 1 person
Thanks!
LikeLiked by 1 person
So cool!
LikeLiked by 1 person
Thanks!
LikeLiked by 1 person
Love the idea of making pencil cases out of sweet packaging, though I’d imagine using the pencil case would make me very hungry 😀
LikeLiked by 1 person
😂😂 yeah that’s true. I’m glad you like it though😊
LikeLiked by 1 person
Genius and original. I love it!
LikeLiked by 1 person
Thank you so much!
LikeLike
This is such a cute diy! Well done xx
LikeLiked by 1 person
Thanks!
LikeLiked by 1 person
I’d love to make this with an M&M packet – cute idea!!
LikeLiked by 1 person
Yeah that would be really cool, I’m glad you like it!
LikeLiked by 1 person
Awesome !
LikeLiked by 1 person
Thanks!
LikeLike
Nice!
LikeLiked by 1 person
Thanks!
LikeLiked by 1 person
Ahhh! This cute DIY looks very cute and cool! I can easily imagine teachers and students freaking out that you have “lollies” in class! Ahaha! 😂 I loooove sewing sooooo much and I just made a pair of tulip shorts but shhh…cos no one knows yet! Hehe! I look forward to reading more posts
Ellie xx 💖🌸
LikeLiked by 1 person
I’m glad you like it! 😊
LikeLiked by 1 person
This is such a cute idea
Vicky
http://vickysscrapbook.com/
LikeLiked by 1 person
Thank you!
LikeLiked by 1 person
Good idea – one for my to-do list! I used to have goudberen Haribo sweets when I was a little girl in Germany – they were so yummy!
LikeLiked by 1 person
I’m glad you like it. And yeah, Haribo is delicious!
LikeLiked by 1 person